Darby’s Brake & Clutch / Frequently Asked Questions
FAQs
What Maintenance Should I be doing and when?
Brake and clutch maintenance are essential for the proper functioning and safety of your vehicle. Here are some general guidelines for maintenance tasks and intervals:
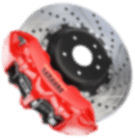
Brake Maintenance:
- Brake Fluid: Check the brake fluid level regularly, typically every 6 months. If the fluid is below the recommended level or appears dirty, it may need to be replaced. Consult your vehicle’s manual for specific recommendations.
- Brake Pads and Shoes: Inspect the brake pads and shoes for wear every 10,000 to 20,000 miles, or as advised by your vehicle manufacturer. Replace them if they are worn out beyond the recommended thickness. Some brake pads have wear indicators that make a screeching noise when they need replacement.
- Brake Rotors and Drums: Have the brake rotors and drums inspected during brake pad replacement. If they are worn unevenly, deeply grooved, or have significant damage, they might need resurfacing or replacement.
- Brake Lines and Hoses: Regularly inspect the brake lines and hoses for leaks, cracks, or signs of wear. Replace them if any damage is detected.
Clutch Maintenance:
- Clutch Fluid: Some vehicles have a hydraulic clutch system that requires clutch fluid. Check the fluid level regularly and top it up if necessary, following your vehicle’s manual.
- Clutch Pedal Feel: Pay attention to the feel of the clutch pedal. If it becomes spongy or starts slipping, it might indicate a problem. Get it inspected by a professional if you notice any abnormalities.
- Clutch Adjustment: Some manual transmissions have a clutch adjustment mechanism. If your clutch pedal has excessive free play or engages too high or low, it might need adjustment. Consult your vehicle’s manual for instructions.
- Clutch Replacement: The lifespan of a clutch can vary depending on driving conditions and habits. If you experience slipping, difficulty shifting gears, or other clutch-related issues, it may be time for a clutch replacement. Consult a professional mechanic for diagnosis and replacement.
It’s important to note that specific maintenance requirements can vary depending on the make and model of your vehicle. Always refer to your vehicle’s manual for manufacturer-recommended maintenance schedules and procedures. If you’re unsure or need assistance, it’s best to consult a qualified mechanic or technician.
How do I know when my car needs a tune up?
- Decreased Performance: If you notice a decrease in your car’s performance, such as reduced acceleration, difficulty starting, rough idling, or a decrease in fuel efficiency, it could be a sign that your car needs a tune-up.
- Poor Gas Mileage: If you find that your vehicle’s fuel efficiency has significantly decreased, it may be worth considering a tune-up. This could involve inspecting and replacing components like spark plugs, air filters, or oxygen sensors that can affect fuel economy.
- Check Engine Light: If the check engine light on your dashboard illuminates and stays on, it’s important to have your vehicle checked by a professional. The check engine light can indicate various issues, including engine misfires or sensor malfunctions, which can be addressed during a tune-up.
- Regular Maintenance Schedule: Following your car manufacturer’s recommended maintenance schedule is essential. Consult your vehicle’s owner’s manual for the specific intervals at which tune-ups are suggested. These schedules typically include tasks like replacing spark plugs, filters, fluids, and inspecting other components.
- Mileage or Time Intervals: Even if your vehicle doesn’t exhibit any noticeable issues, it is still advisable to have a tune-up at regular mileage or time intervals. This can help prevent potential problems and keep your vehicle running smoothly. Common mileage intervals for tune-ups can range from 30,000 to 100,000 miles, depending on the vehicle.
Remember, the exact requirements for a tune-up can vary depending on the make and model of your vehicle, so it’s always a good idea to consult your owner’s manual or speak with a qualified mechanic for personalized advice.
Why do I need to have my engine oil changed every 3,000 miles?
Here are some key points to consider:
- Manufacturer Recommendations: The best source of information regarding oil change intervals is your vehicle’s owner’s manual. The manufacturer typically provides guidelines on when to change the engine oil based on their specific engine design, oil type, and other considerations. Many modern vehicles can go longer between oil changes, with intervals ranging from 5,000 to 10,000 miles or more.
- Oil Quality and Type: The quality and type of oil used can affect the oil change interval. Synthetic oils, for example, tend to provide better protection and can often last longer between changes compared to conventional oils. Synthetic blends and high-performance oils may also have different recommendations.
- Driving Conditions: Severe driving conditions, such as frequent stop-and-go traffic, towing heavy loads, driving in dusty or extreme temperature environments, or frequent short trips, can put additional stress on the engine and oil. In such cases, more frequent oil changes may be necessary to maintain optimal engine performance and protection.
- Regular Oil Level Checks: Regardless of the recommended interval, it’s important to regularly check your engine’s oil level using the dipstick. If the oil level drops significantly between changes, it could be an indication of a leak or another issue that needs attention.
It’s worth noting that many vehicles now come equipped with oil life monitoring systems that use various sensors and algorithms to determine the optimal oil change interval based on real-time driving conditions. These systems provide a more accurate indication of when the oil needs to be changed compared to fixed mileage intervals.
To ensure you’re following the most appropriate oil change interval for your specific vehicle, it’s always best to consult your owner’s manual and adhere to the manufacturer’s recommendations.
How often should I rotate my tires?
- Regular Interval: It is commonly recommended to rotate your tires every 5,000 to 8,000 miles. This interval provides a good balance between maintaining even tire wear and aligning with typical oil change intervals.
- Vehicle-Specific Recommendations: Some vehicle manufacturers may provide specific recommendations for tire rotation intervals. Consult your vehicle’s owner’s manual for the manufacturer’s suggested guidelines.
- Tire Type: The type of tires on your vehicle can influence the rotation interval. For example, if you have directional tires or tires with different sizes for the front and rear, the rotation pattern and frequency may differ. It’s important to follow the tire manufacturer’s recommendations regarding rotation for specific tire types.
- Driving Conditions: If you frequently drive in severe conditions, such as off-road, gravel, or uneven surfaces, you may need to rotate your tires more frequently. These conditions can cause uneven wear, and more regular rotations can help maintain tire performance and longevity.
- Regular Inspections: Regardless of the recommended rotation interval, it’s a good idea to visually inspect your tires regularly. Look for signs of uneven wear, such as excessive wear on the edges or in specific areas. If you notice uneven wear, it may be necessary to rotate the tires earlier than the recommended interval.
Proper tire rotation patterns vary depending on factors like the vehicle’s drivetrain (front-wheel drive, rear-wheel drive, all-wheel drive), tire sizes, and specific tire characteristics. To ensure the correct rotation pattern for your vehicle, it’s best to consult your owner’s manual or seek guidance from a qualified mechanic or tire professional.
Remember, regular tire rotation is essential for maintaining optimal tire performance, promoting even wear, and maximizing the lifespan of your tires.
What should I do if my car starts to overheat?
- Safely Pull Over: As soon as you notice the temperature gauge rising or steam coming from the engine compartment, find a safe place to pull over and park your car. Turn off the engine to allow it to cool down.
- Pop the Hood: After turning off the engine, open the hood to allow heat to escape and aid in the cooling process. Be cautious not to touch any hot engine components.
- Do Not Remove the Radiator Cap: It’s crucial to let the engine cool down before attempting any further actions. Opening the radiator cap while the engine is hot can cause hot coolant to spray out, leading to burns. Wait until the engine has cooled completely before proceeding.
- Check Coolant Level: Once the engine has cooled down, check the coolant level in the reservoir or radiator (if accessible). If the coolant level is significantly low, it may indicate a leak or other cooling system issues. Adding coolant or water (if coolant is not available) can help temporarily, but it’s essential to address the underlying problem.
- Inspect for Leaks: Look for any visible coolant leaks around hoses, radiator, water pump, or other components. If you find a leak, it’s advisable to call for roadside assistance or have the vehicle towed to a trusted mechanic for repair.
- Call for Assistance: If you’re unable to identify the cause of the overheating or if the problem persists after adding coolant, it’s best to contact a professional mechanic or roadside assistance service to assess the situation and provide further guidance.
It’s worth noting that continued driving with an overheating engine can cause severe damage, including a blown head gasket or engine failure. Therefore, it’s crucial to address the issue promptly and avoid attempting repairs yourself unless you have the necessary knowledge and experience.
How do I make sure my car battery has a good electrical connection?
- Clean the Battery Terminals: Over time, battery terminals can accumulate corrosion and other contaminants, which can hinder the flow of electricity. Inspect the battery terminals regularly and clean them if you notice any corrosion. Mix a solution of baking soda and water, and use a wire brush to gently scrub the terminals until they are clean. Rinse with clean water and dry thoroughly.
- Check the Battery Cables: Inspect the battery cables for any signs of damage, such as cracks, fraying, or corrosion. Damaged cables can affect the electrical connection. If you notice any issues, it may be necessary to replace the cables.
- Ensure a Tight Connection: Make sure the battery terminals are securely tightened onto the battery posts. Loose connections can lead to poor electrical contact and can even cause the car not to start. Use a wrench or pliers to tighten the terminals, but be cautious not to overtighten, as this can damage the terminals.
- Apply Dielectric Grease (Optional): Dielectric grease can be applied to the battery terminals after cleaning to help prevent future corrosion. Apply a small amount to the terminals and spread it evenly. However, avoid getting the grease on the battery posts, as it can interfere with the electrical connection.
- Regular Maintenance: It’s important to maintain a regular maintenance schedule for your car’s electrical system. This includes checking the battery’s condition, testing its voltage and capacity, and replacing it if necessary. Additionally, periodically inspect the battery terminals and cables for any signs of corrosion or damage.
By following these steps, you can help ensure a good electrical connection for your car battery. If you encounter persistent issues with your electrical system or have concerns about your battery’s performance, it’s advisable to consult a qualified mechanic for a thorough inspection and any necessary repairs.
Should I consider using synthetic motor oil in my vehicle?
- Performance and Protection: Synthetic motor oil is engineered to provide better lubrication and protection compared to conventional oils. It offers improved viscosity stability, better resistance to breakdown, and enhanced performance in extreme temperatures. If you have a high-performance or turbocharged engine, synthetic oil is often recommended to provide the necessary protection.
- Extended Oil Change Intervals: Synthetic motor oil typically has a longer service life compared to conventional oils. It can often go longer between oil changes, reducing maintenance frequency and costs. However, it’s important to follow the manufacturer’s recommendations for oil change intervals, as they may vary depending on the vehicle and driving conditions.
- Cold Start Protection: Synthetic oil flows more easily at low temperatures, which means it provides better protection during cold starts. This can be particularly beneficial in colder climates or for vehicles that experience frequent cold starts.
- Fuel Efficiency: Synthetic motor oil’s reduced friction properties can contribute to improved fuel efficiency. While the effect may be marginal, it can be a factor to consider, especially if you’re looking to maximize fuel economy.
- Cost: Synthetic motor oil is generally more expensive than conventional oil. However, considering the extended oil change intervals and potential benefits in terms of engine protection and performance, the overall cost difference may be less significant.
It’s important to note that not all vehicles necessarily require synthetic motor oil. It’s recommended to consult your vehicle’s owner’s manual for the manufacturer’s recommendations on the type of oil to use. Some vehicles explicitly require synthetic oil, while others may have different requirements based on the engine design and specifications.
If you’re uncertain about using synthetic motor oil or have specific concerns about your vehicle, it’s always a good idea to consult a trusted mechanic or contact the vehicle manufacturer for personalized advice based on your vehicle’s specific requirements.
Why does my brake pedal vibrate when I’m slowing down from freeway speeds?
If you experience a vibrating brake pedal when slowing down from freeway speeds, it could be an indication of an issue with your braking system. Here are a few potential causes:
- Warped Brake Rotors: Warped brake rotors are a common cause of brake pedal vibration. When you apply the brakes, the pads press against the rotors to slow down the vehicle. If the rotors have become warped due to heat or wear, they may create an uneven surface. As a result, when the brake pads come into contact with the uneven rotor surface, you may feel vibrations in the brake pedal.
- Worn Brake Pads: If your brake pads have worn down unevenly or have developed an irregular surface, it can lead to brake pedal vibration. The uneven contact between the pads and rotors can cause pulsation or vibrations when braking.
- Loose or Faulty Brake Components: Loose or worn brake components, such as calipers, mounting hardware, or wheel bearings, can cause vibrations. If these components are not properly secured or functioning correctly, it can result in inconsistent braking and pedal vibrations.
- Uneven Tire Wear or Tire Issues: Although less common, uneven tire wear or tire issues can also create vibrations that may be felt through the brake pedal. It’s a good idea to inspect your tires for any signs of irregular wear or damage.
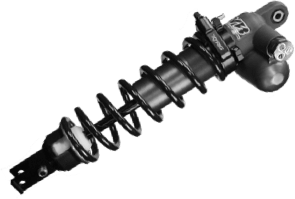
- Suspension or Steering Issues: In some cases, vibrations in the brake pedal can be related to suspension or steering components. Faulty suspension parts, such as worn bushings or ball joints, can lead to vibrations that are transmitted to the brake pedal during braking.
If you experience consistent brake pedal vibrations, it’s important to have your braking system inspected by a qualified mechanic. They will be able to identify the exact cause of the issue and perform the necessary repairs or maintenance to ensure your brakes are functioning properly and your vehicle is safe to drive.
Have a Car Repair Question?
Get your automotive-related questions answered by a mechanic
Have A Question